Mac Preview is a powerful and the default app for viewing images on Mac Desktop, but somehow over the years, I have not found it to be intuitive enough to use without some deliberate exploration or learning.
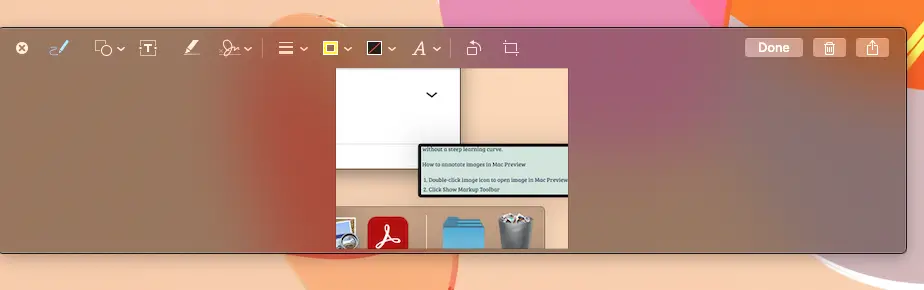
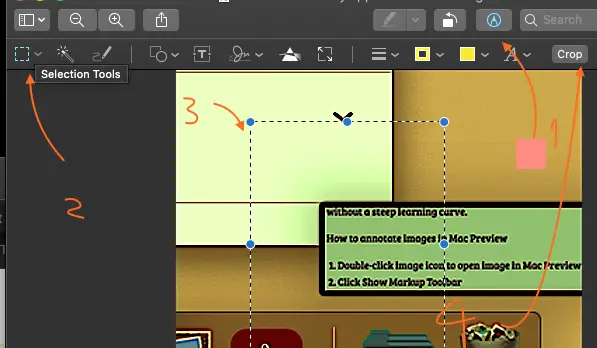
How to annotate images and PDFs in Mac Preview:
- Double-click image icon or right-click PDF to open in Mac Preview
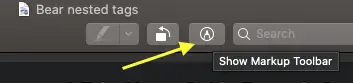
- Click Show Markup Toolbar
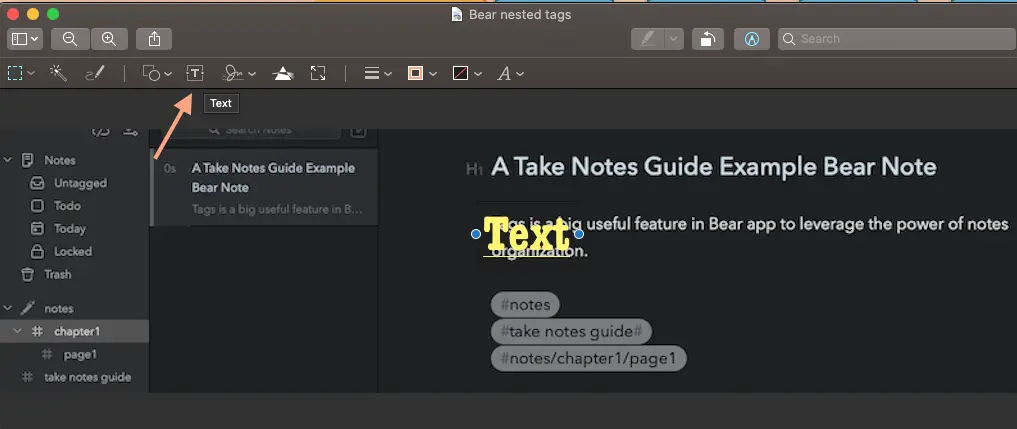
- Click T in a box and a text field will appear on the image for editing
- Move the text field simply by clicking elsewhere first before click-and-drag the text
- Change the font style by clicking the down arrow next to A above
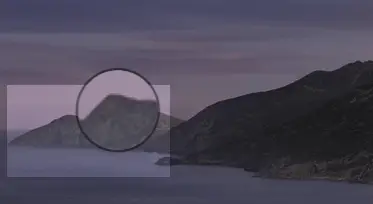
- An arrow will appear on the image after clicking the down arrow next to the square-circle icon and the arrow. Click and drag the arrow to re-position it
- Click the 3 lines icon above while the arrow is still selected to change the style of the arrow
How to remove an area (make transparent) in an image with Mac Preview?
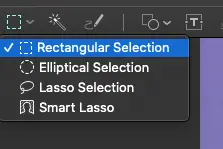
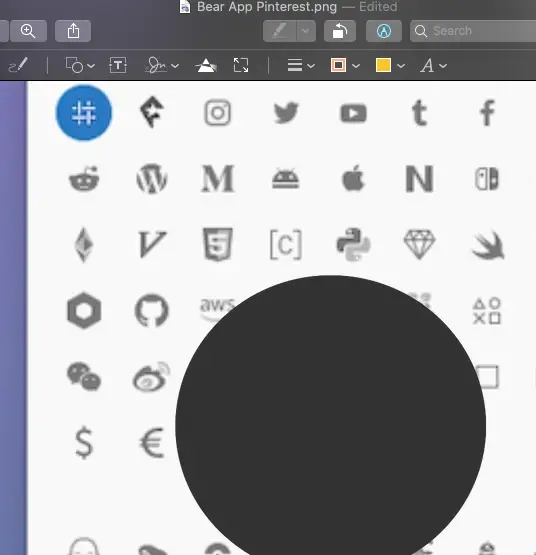
- Click Selection Tool (top-left dotted square icon), and select the type of selection area
- Click and drag an area for removing
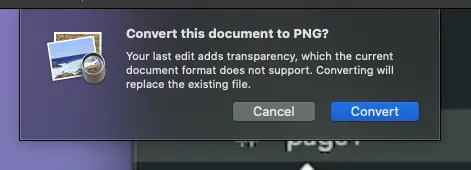
- Type Del key
- Agree to convert to PNG if prompted
How to color an area in an image with Mac Preview?
- Select the shapes icon above, choose the shape, and it will appear on the image
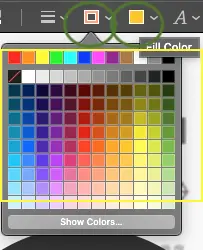
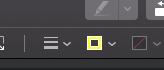
- Set the border and color with the icons above accordingly
Note: The red slash on a black square in the palette means no color or transparency mode.
There are 2 reasons why we may use a shape on an image. Covering up sensitive or confidential information is one. Secondly, text can be added to the shape space.
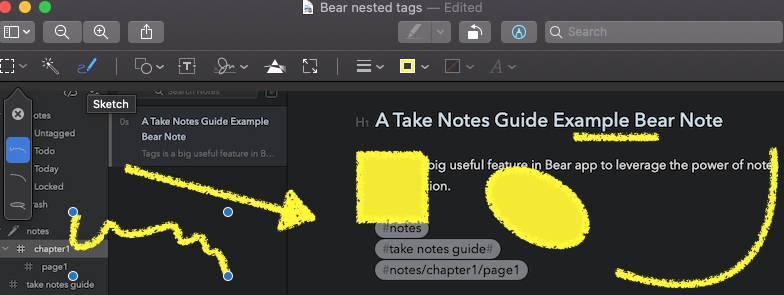
How to sketch in Mac Preview?
Click the Sketch Tool (scribbling pen icon) above the image after enabling Markup Toolbar (blue A in circle icon). Customize the brush with Shape style and Border color. Start sketching. Mac Preview automatically detects and converts to certain shapes that you sketch e.g. Arrows, circles or ovals, squares, triangles, pentagon, straight line, and even a simple curve (with simple adjustments).
Sketching is a useful tool in Mac Preview that helps to quickly add certain shapes elements as well.
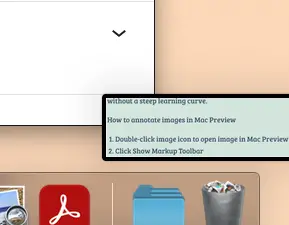
How to quickly edit screenshots in Mac Preview?
You may also have noticed fresh screenshots e.g. CMD+Shift+4, will appear for a short while at the bottom-right corner. Double-click that image quickly will show up a scaled-down version of Mac Preview.
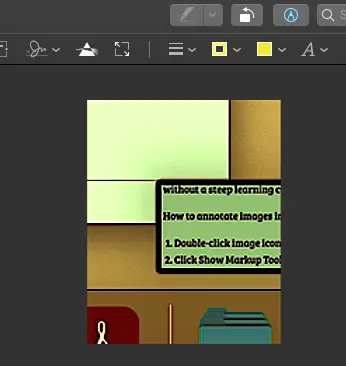
How to crop an image in Mac Preview?
- Enable Markup Toolbar
- Selection Tools to choose the shape of the selection
- Select an area on the image
- Click Crop
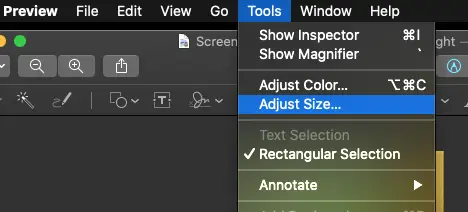
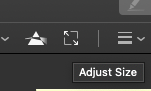
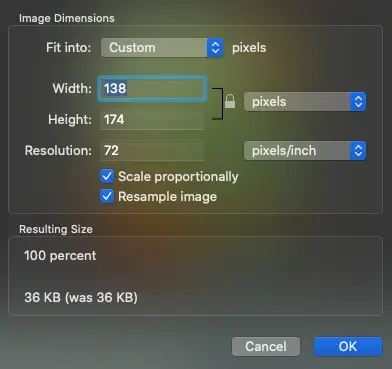
How to adjust the image size in Mac Preview?
Mac Preview Menu->Tools->Adjust Size. Or Markup Tool icon-> Adjust Size icon (2 arrows in a square box).
How to adjust color in Mac Preview?
After enabling the Markup Toolbar icon, click the Adjust Color (prism icon) and adjust the colors. Please note that undo changes shortcut command key may not work here, so be sure to modify with a backup copy.

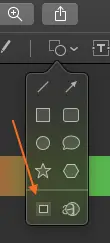
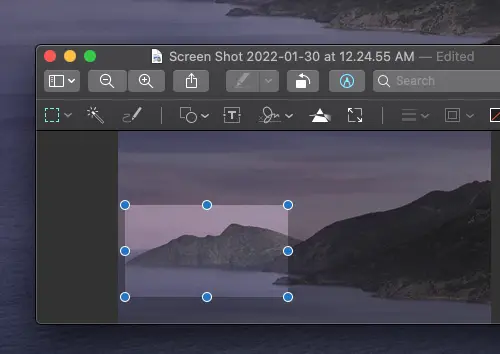
How to quickly highlight an area of an image in Mac Preview?
- Enable Markup Toolbar
- Click the Shapes icon and select the square with an outer shadow icon (bottom-left)
- Adjust the corners of the selection and exit when done

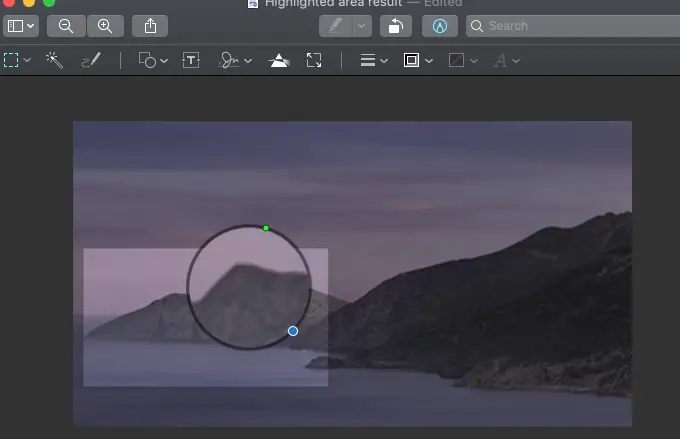
How to apply a magnifying lens effect on an image in Mac Preview?
- Enable the Markup Toolbar
- Click the Shapes icon and select the multiple circles icon (bottom-right)
- Adjust the lens location and effect before exit

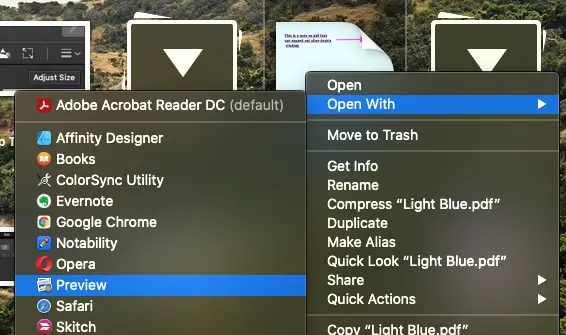
How to edit a PDF file in Mac Preview?
- Open the Pdf file in Mac Preview e.g. Right-click on file->Open With->Preview
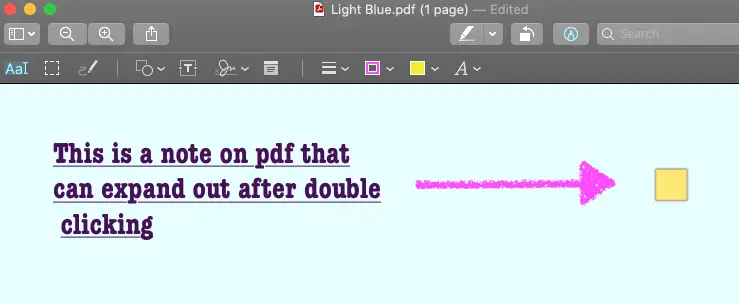
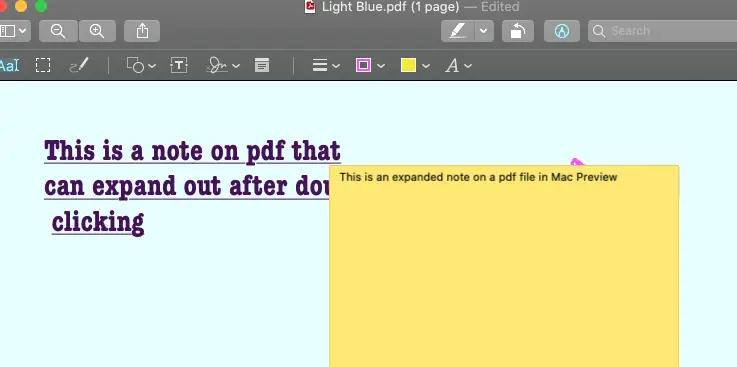
- Enable Markup toolbar
- Add text, arrows, note, etc. Note can be expanded for text insertion.
The ability to edit Pdfs directly and quickly on Mac Preview is a useful benefit for Mac Desktop users.
What are the advantages of Mac Preview?
- Mac Preview is a powerful auto-save default image viewing and editing software
- It is stable and loads fast
- Common image editing features include annotation with arrows, sketching, shapes, cropping, removing an area, adding signatures, adjusting image size and resolution, and color adjustment.
- Supports both image and PDF formats
These benefits can increase our productivity when handling large numbers of images and PDFs over time. Whether you are a graphics designer, marketing professional, online entrepreneur, or blogger, knowing the basics or mastering Mac Preview can truly be a useful skill to acquire.
Conclusion
This is a basic write-up to share with beginners who were also in the same plight: Any beginners who want to be productive on Mac Desktop with basic images quickly without a steep learning curve or another graphic app.
Adjusting size with Mac Preview is one of the most useful features I had used over the years.
Hopefully, this can be the missing guide to learning Mac Preview for Mac beginners.
Be wholesome.
More Information
How to undo changes made in Mac Preview?
CMD+z can undo most changes made.
Is there a good alternative to Mac Preview?
You may also want to read about Skitch in How To Make Simple Changes To Images On Mac Easily that can be easier to make simple image editing preferred for some.
Is there a way to convert image size for many images quickly in a batch?
Please read How To Batch Convert Images Sizes In Mac Fast.