I have multiple images of various sizes on Mac Desktop that I have to convert each and every time to a certain width i.e. 800px for my blog post, and for some images, I have to edit it before converting. And clicking to open all the files and go to Adjust Size just to set it can be a hassle for so many images. So I looked around for a solution that can save my time and effort. By the way, Mac Preview sometimes takes a while to launch or work.
I found a neat way (for exporting to JPG) to convert multiple images just by selecting all the files, opening them in Preview, selecting all of them again from the left-side thumbnail, Tools->Adjust Size to set all the sizes. However, launching Mac Preview and clicking around still takes longer than I preferred.
Then I found a better and much faster solution (Stackoverflow’s source) to convert images size from the Mac command line.
How To Batch Convert Images Sizes In Mac Fast
Launch the Mac Terminal program i.e. Go to Mac Desktop Launchpad, search for Terminal, and, click it. Press CMD+ to increase the font if it is too small.
If your images are at your Desktop, at the dollar prompt, type cd ~/Desktop
Say I want to convert all png (you may replace it with jpg) images so both the height and width will not be greater than a specified size e.g. 800px.
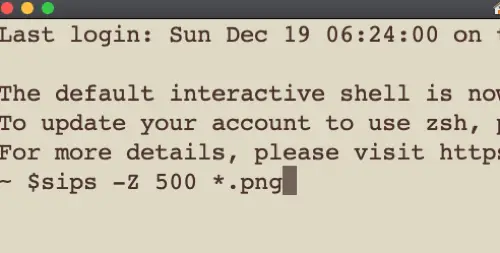
Enter the following command after the dollar prompt and type return:
sips -Z 800 *.pngIf you want a specific height of 1000px and width 800px for all jpg files, then use the small-capitalization z, for example:
sips -z 1000 800 *.jpgOnce it was done, type exit and press CMD+q to quit the terminal program. Another advantage is that we can use the up arrow key to quickly access the command history without typing over again even after we quit and relaunch the terminal program.
How fast can SIPS convert images?
It was really fast. 5 images seem to convert in under a second.
More Information
Why convert images on Mac Preview?
Images seem to shrink in size once converted on Mac Preview.
How to change and save the Mac terminal program theme?
From the menu, go to Terminal->Preferences, select your preferred theme on the left, and customize it on the right e.g. increase font size, and remember to click default theme at the left bottom so this theme will be launched every time. It is also a good idea to right-click the Terminal program icon at the Mac Desktop dock, go to Options-> Keep In Dock for quicker access in the future.


