This is a basic guide and reminder to self and others how to create curves from graphics software i.e. Affinity Designer. Hope you find this useful.
3 ways to create curves in Affinity Designer for beginners
- Pen Tool (Default setting)
- Corner Tool
- Edit shapes
Why are curves in Affinity Designer or other graphics software important?
Creating good curves is one of the most important basics and need in graphic design. One of the first things we may want to do in graphics software is to create beautiful curves. I consider this one of the main bread and butter skillsets of a competent graphic designer.
Pen Tool
How to create natural curves in Affinity Designer?
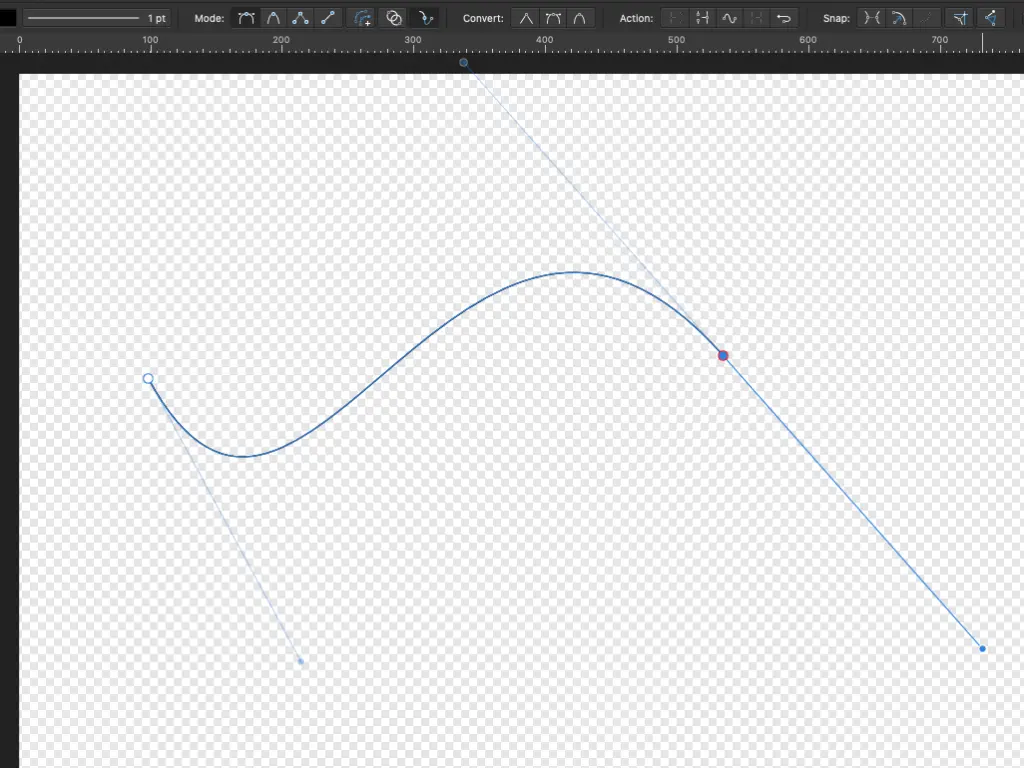
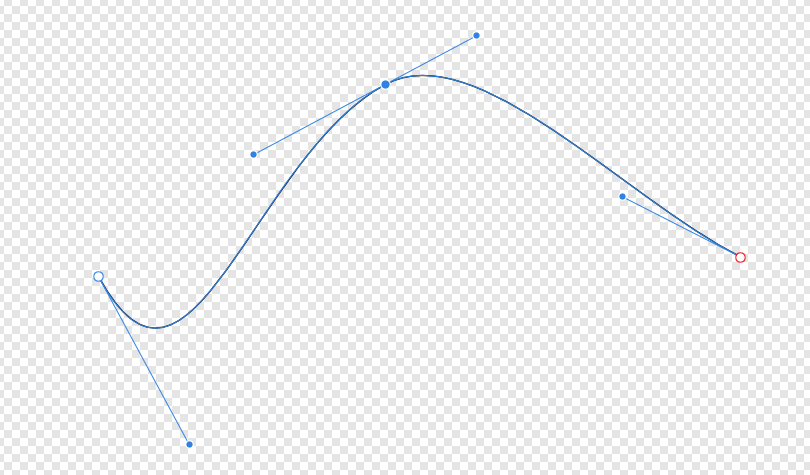
With the Pen (Tool) in Pen Mode, this is the most powerful Pen tool. It can create organic-looking curves.
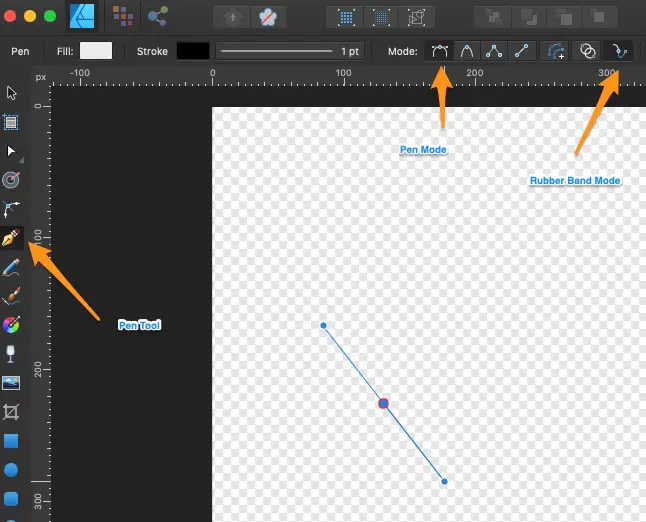
- Click the Pen Tool on the left
- Check to see if Pen Mode above is enabled
- Enable Rubber Band Mode for curve preview (optional)
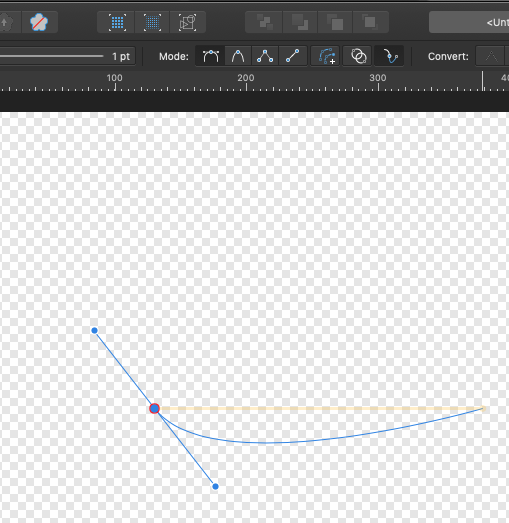
- Click on the canvas. If you do not release the mouse click yet, you can drag and and customize the curve control handles (blue symmetrical lines) and then release the mouse click.
- Move your mouse around and a preview of the curve follows along If Rubber band Mode is enabled
- Click another point elsewhere on the canvas without releasing the mouse click. Move your mouse around to achieve the desired effect and then release the mouse click.
- Once you are done with the curve, press ESC to stop continuing on to the next curve node.
How to adjust or modify the curve created with the Pen Tool in Affinity Designer?
To adjust an existing node of a curve, click the Node Tool on the left, select the curve layer on the right, and click the node point or its blue curve handle to adjust the curve.
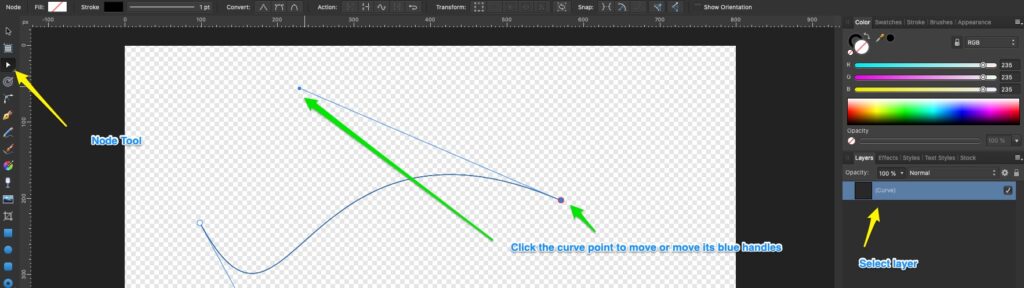
To modify a curve, we can add a node or nodes by double-clicking anywhere on the curve (with the Node Tool, and curve layer selected), and then dragging that node or its blue handles around.
This may achieve even more natural-looking curves as shown above.
Corner Tool
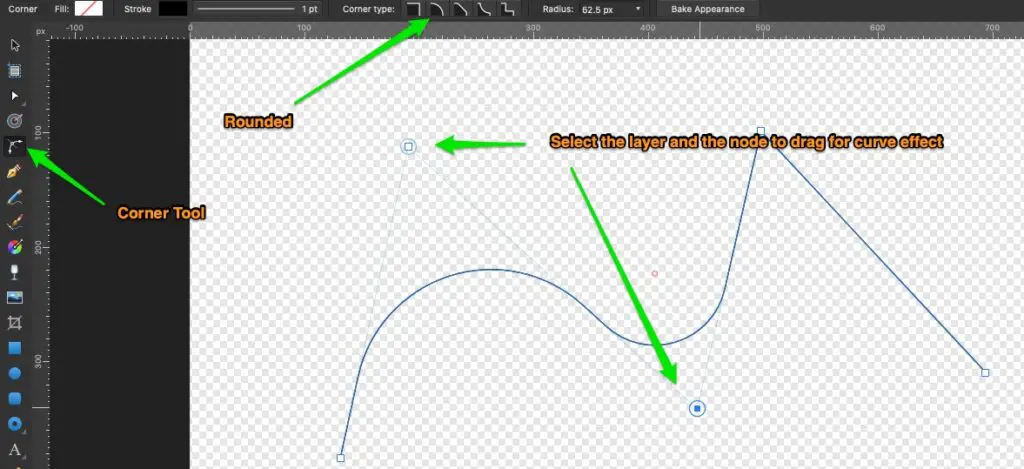
How to create quick curves with the Corner tool in Affinity Designer?
- Select the Corner Tool on the left
- Select Rounded for Corner Type above
- Make sure the layer for the design (e.g. created from Pen Tool) is still selected
- Simply click a node point and drag for the desired effect
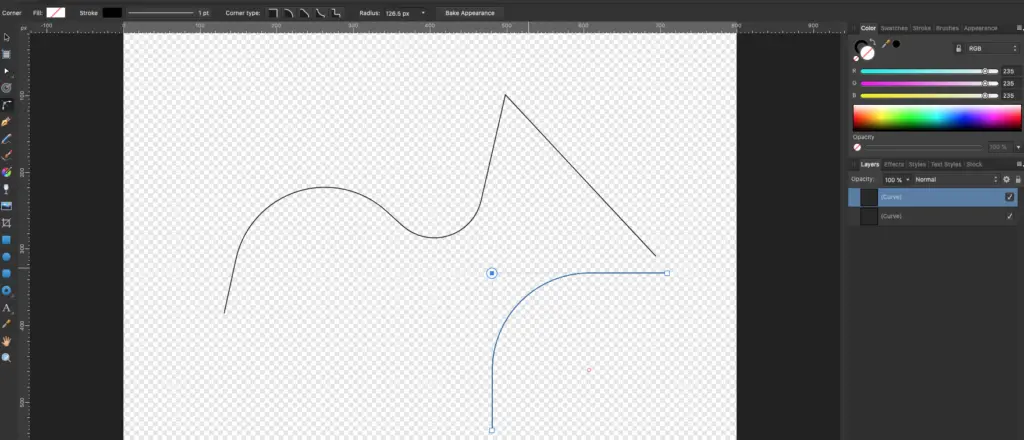
We can create a perfectly aligned curve from a right angle (Press Shift while clicking with the Pen Tool) by dragging the node of the right angle as well. This is a quick and good way to create clean symmetrical curves in Affinity Designer.
Edit Shapes
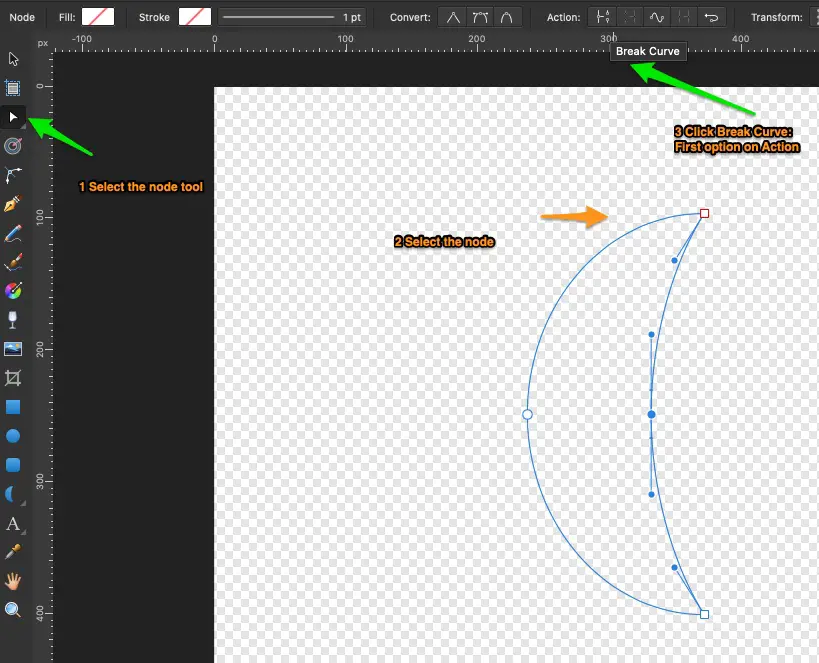
How to create curves from shapes in Affinity Designer?
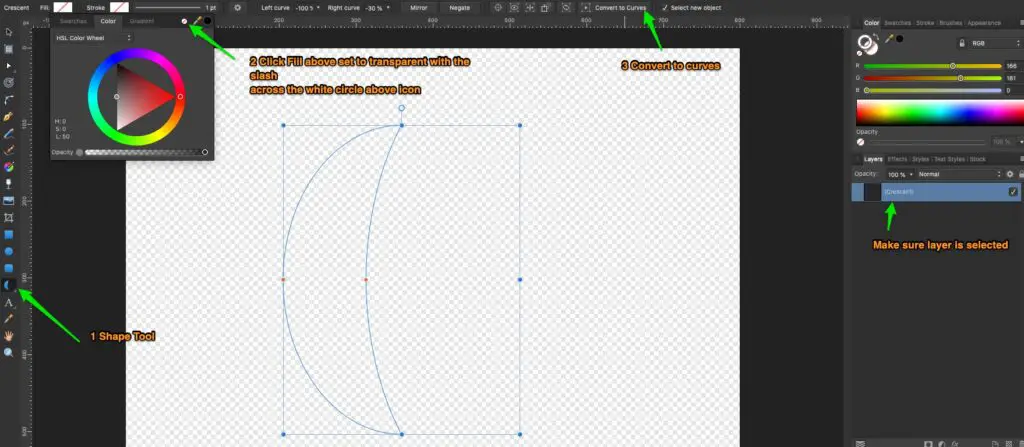
We can create curves from some shapes starting from the shape Tool on the left. For example, we can use the crescent shape from the Shape Tool.
- Select a suitable shape from the Shape Tool on the left
- Make the color transparent with Fill above and clicking the transparent icon (small white circle with a slash)
- With the layer still selected, click Convert to Curves above
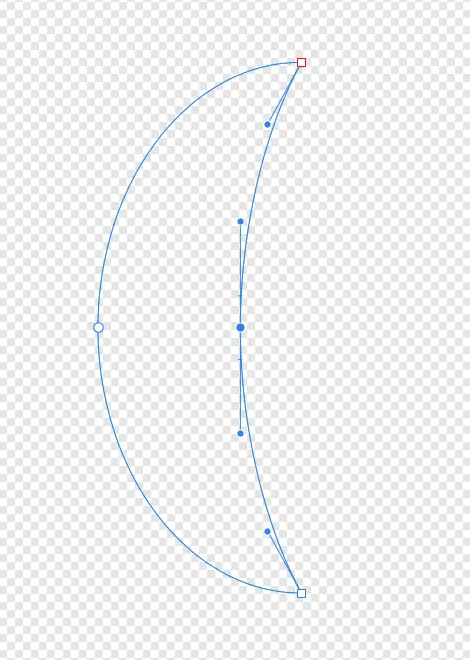
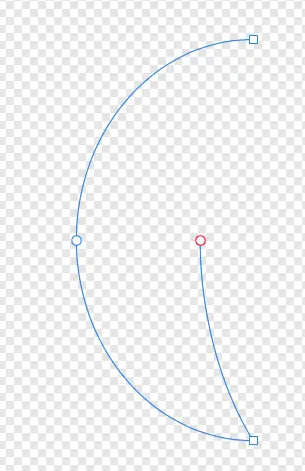
- Select the Node Tool, click the node (for deletion), and click Action-Break Curve above
- Adjust the curve by clicking and dragging the node or nodes if needed
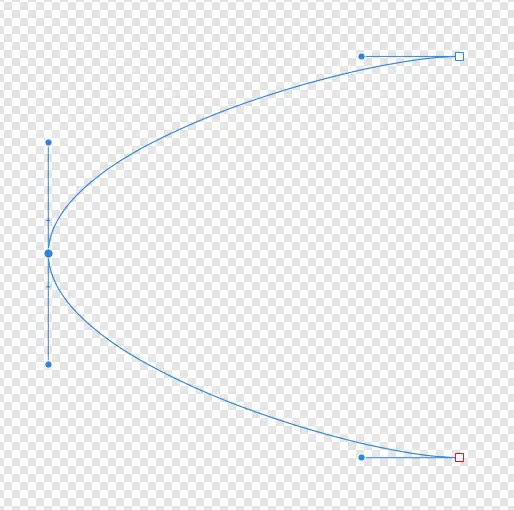
For perfect curves, there are also other shapes to accomplish this.
What are some useful keyboard shortcuts to using Affinity Designer?
Remember CMD+z to undo any changes made and can be used repeatedly to undo more changes stored in history. Some other handy keyboard shortcuts by typing the alphabet in Affinity Designer include Node tool (A) and/or Corner tool (C) Rounded Corner type(C), Move Tool (V), Pen Tool (P), and Text Tool(T).
Conclusion
Pen tool (P) with repositioning off-curve control handles (blue symmetrical lines) and enabling rubber band mode can create good curves that look natural and organic.
Corner Tool (C) is really a quick and easy way to create curves from pointed corners.
Creating curves by editing shapes is also a feasible method.
Like all good endeavors, it is likely you have to spend some time practicing and exploring before you get more adept at it.
More Information
Is there more information on Affinity designer tools for pen and curves?
Affinity Pen Tool and Draw Curves & Shapes reference guide. YouTube has videos on more and related information.