![How To Create Player On Platform With Godot Free](https://www.goodpassive.com/wp-content/uploads/2022/06/How-To-Create-Player-On-Platform-With-Godot-Free-683x1024.jpg)
Godot is a good and free open-source game engine that can be used for personal and commercial projects of any purpose, not just games. To illustrate the power of this game engine, let us build a simple game environment for a player that can navigate around on a platform.
The goal here is just to create a player or sprite that can move left or right and jump around a platform environment. It is not a complete game but this tutorial guide may serve as a taste of what working with the Godot game engine can be like.
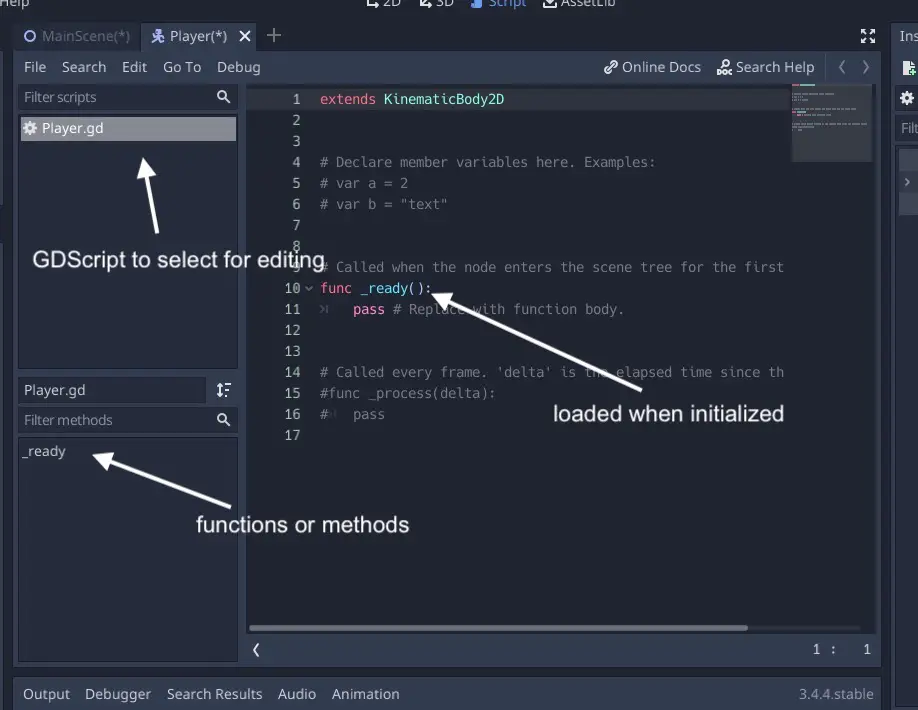
Readers should at least learn about the basics of the Godot game engine interface. Feel free to use this post to refer back and review Godot interface basics.
![Godot nodes](https://www.goodpassive.com/wp-content/uploads/2022/06/Godot-nodes-1024x576.jpg)
Just download and double-click to run the Godot game engine file.
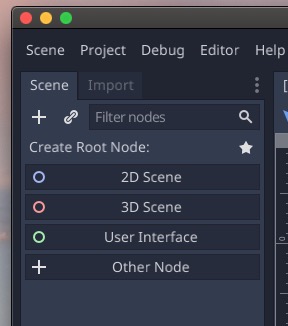
Start a new project with a new empty folder.
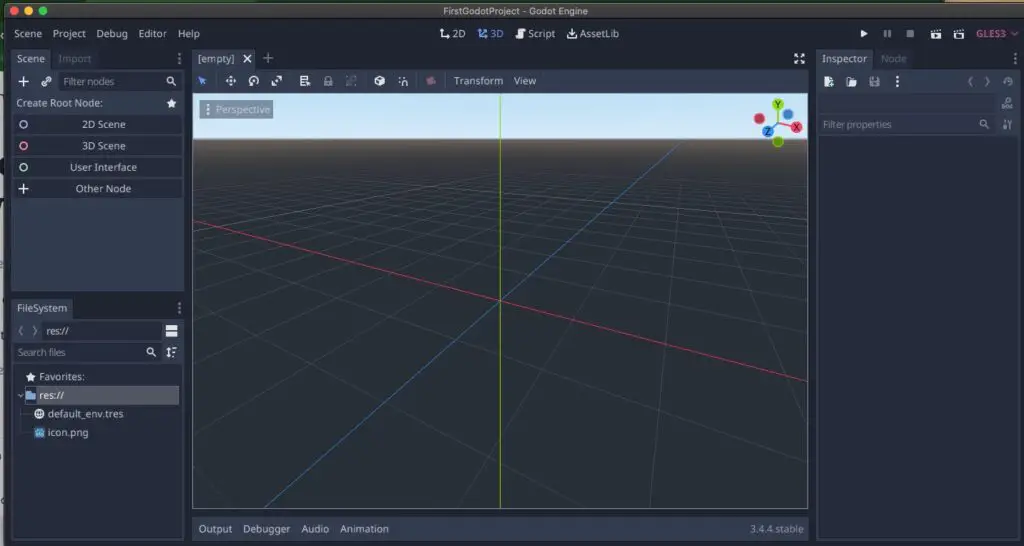
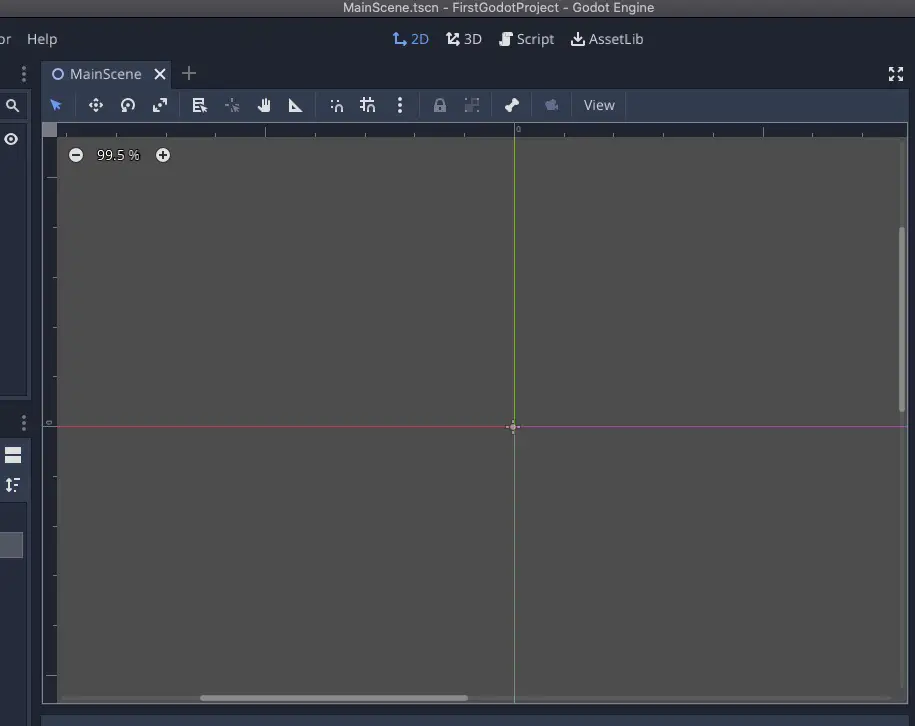
![Godot start screen](https://www.goodpassive.com/wp-content/uploads/2022/06/Godot-start-screen-1024x546.jpg)
![Select 2D from above](https://www.goodpassive.com/wp-content/uploads/2022/06/Select-2D-from-above.jpg)
Click on 2D Scene
![Nodes overview on the left](https://www.goodpassive.com/wp-content/uploads/2022/06/Nodes-overview-on-the-left.jpg)
![Click on Node2D](https://www.goodpassive.com/wp-content/uploads/2022/06/Click-on-Node2D.jpg)
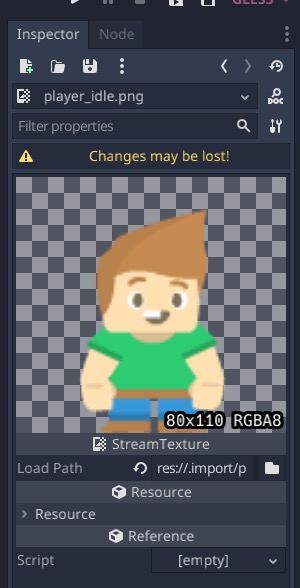
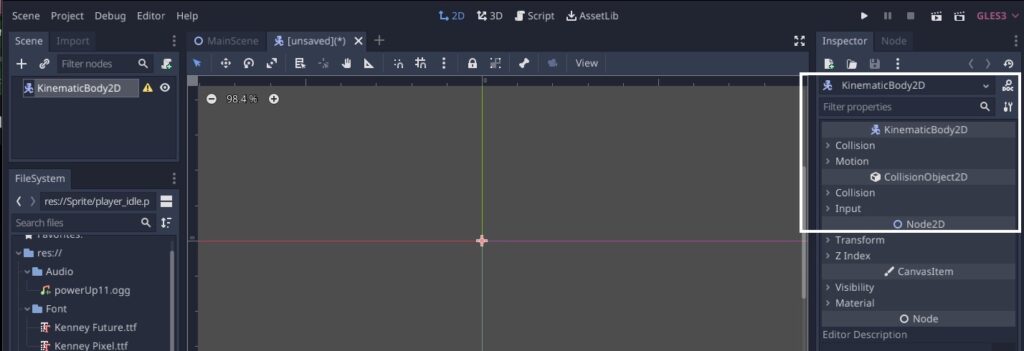
Notice the Inspector on the right where we can change the options e.g Transform and visibility
![Inspector](https://www.goodpassive.com/wp-content/uploads/2022/06/Inspector-1024x531.jpg)
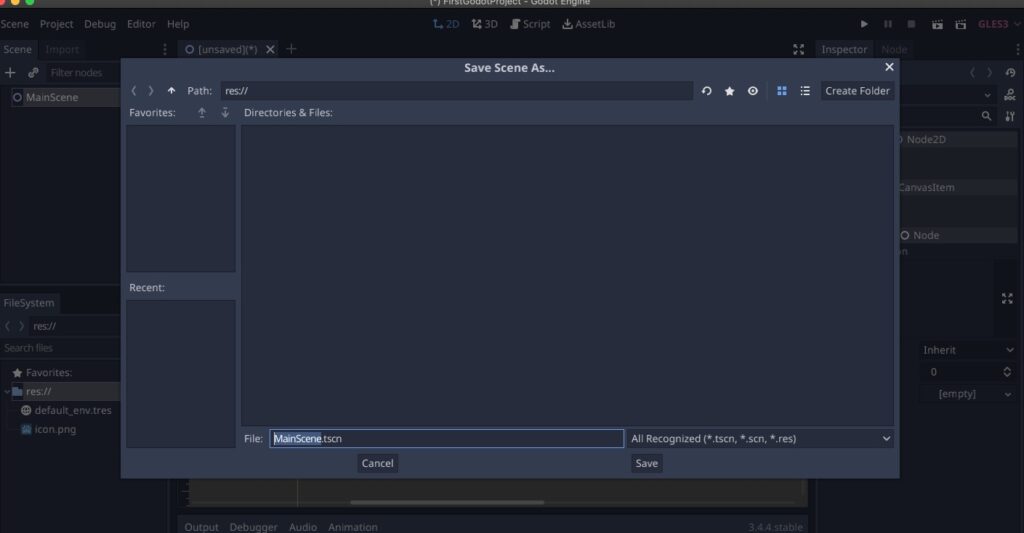
Type CMD+S (or Ctrl+s for Windows) to save the scene e.g. MainScene.tscn.
![Save the scene](https://www.goodpassive.com/wp-content/uploads/2022/06/Save-the-scene-1024x533.jpg)
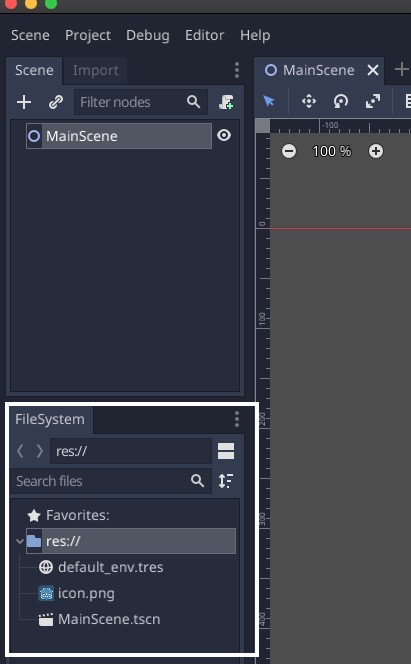
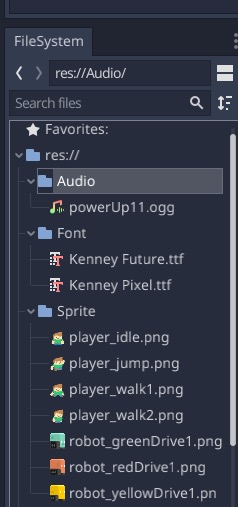
The filesystem is where we can have an overview and start importing assets into the game.
![Overview of all our assets](https://www.goodpassive.com/wp-content/uploads/2022/06/Overview-of-all-our-assets.jpg)
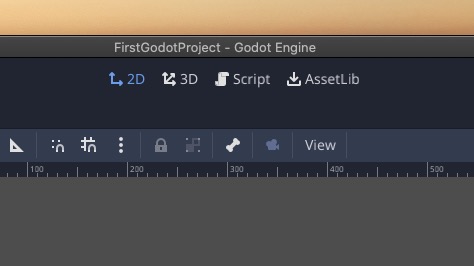
We can also click 3D from the top to view it in 3D. Next to it is the Script part where we put in the codes for the nodes or assets.
![3D view option above](https://www.goodpassive.com/wp-content/uploads/2022/06/3D-view-option-above.jpg)
The middle or right mouse click can move the axis point around.
![The middle or right mouse click can move the axis point](https://www.goodpassive.com/wp-content/uploads/2022/06/The-middle-or-right-mouse-click-can-move-the-axis-point.jpg)
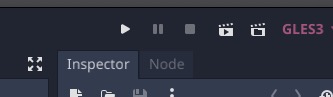
On the top-right are the buttons to play, pause, and stop the game. We can also play the scene with the action-cut icon. The last is the custom scene for selecting a scene to launch.
![Play and stop game](https://www.goodpassive.com/wp-content/uploads/2022/06/Play-and-stop-game.jpg)
Let us start importing some assets into the game.
![Right click res and select File Manager](https://www.goodpassive.com/wp-content/uploads/2022/06/Right-click-res-and-select-File-Manager.jpg)
![Create audio font and sprite folders](https://www.goodpassive.com/wp-content/uploads/2022/06/Create-audio-font-and-sprite-folders.jpg)
Start gathering some assets for your game e.g free assets from Kenney.nl. And import these assets into your asset folders,
![Kenney 1](https://www.goodpassive.com/wp-content/uploads/2022/06/Kenney-1-1024x564.jpg)
For example, we need to collect a player sprite (idle, jump, first walking, second walking poses), a robot sprite, a coin or reward sprite, a sound for collecting the reward, and font or two for the game. For the purpose of this simple tutorial, just get one sprite image and one tile.
All can be found on Kenney for free.
![Imported assets in Godot game](https://www.goodpassive.com/wp-content/uploads/2022/06/Imported-assets-in-Godot-game.jpg)
![Double click on the asset to view or modify in the Inspector on the right.](https://www.goodpassive.com/wp-content/uploads/2022/06/Double-click-on-the-asset-to-view-or-modify-in-the-Inspector-on-the-right..jpg)
Next, we will create a player in a new scene.
![Create a new Scene](https://www.goodpassive.com/wp-content/uploads/2022/06/Create-a-new-Scene.jpg)
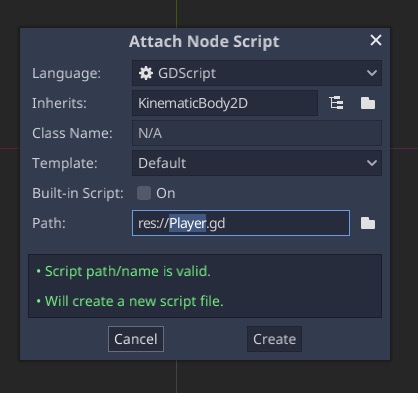
For a player sprite, we need to apply physics to it. Click on Other Node -> Kinematics2DBody.
![Other Node and KinematicBody2D to apply physics to the sprite](https://www.goodpassive.com/wp-content/uploads/2022/06/Other-Node-and-KinematicBody2D-to-apply-physics-to-the-sprite.jpg)
We will leave the Inspector physics settings for this Kinematics2DBody alone for now.
![Built in physics settings for Kinematics2dBody node](https://www.goodpassive.com/wp-content/uploads/2022/06/Built-in-physics-settings-for-Kinematics2dBody-node-1024x351.jpg)
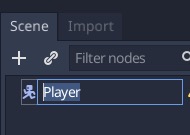
We may double click the word Kinematics2dBody to rename it e.g. Player
![Double click Kinematics2dBody to rename it](https://www.goodpassive.com/wp-content/uploads/2022/06/Double-click-Kinematics2dBody-to-rename-it.jpg)
![WIth the Player scene selected drag a player sprite image into the main space](https://www.goodpassive.com/wp-content/uploads/2022/06/WIth-the-Player-scene-selected-drag-a-player-sprite-image-into-the-main-space.jpg)
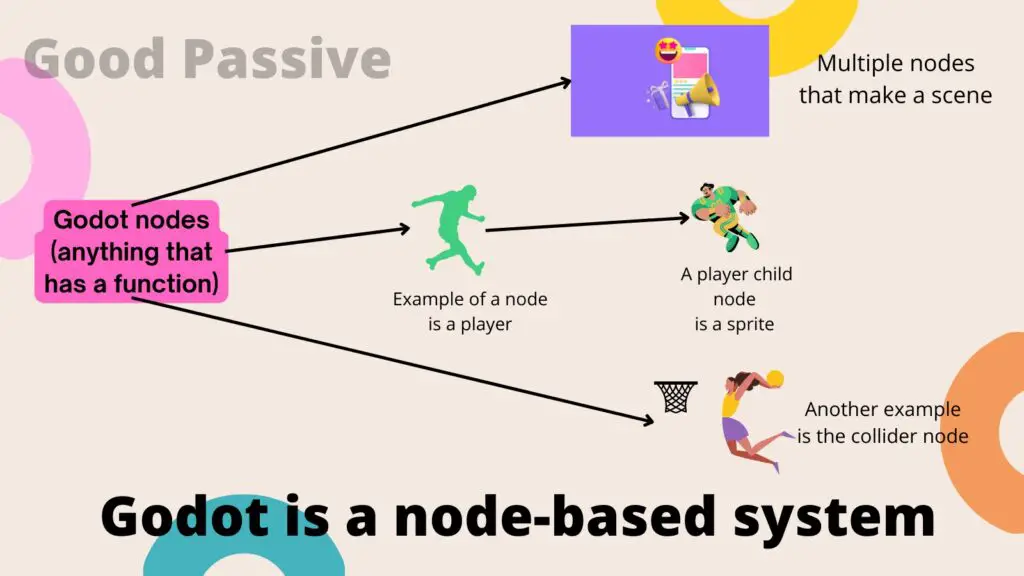
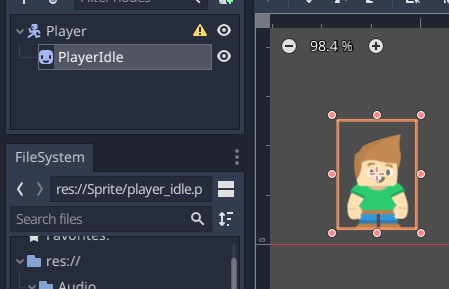
Whatever happens to the parent Player node will apply to all the children nodes.
![This visual node is a child of the Player node](https://www.goodpassive.com/wp-content/uploads/2022/06/This-visual-node-is-a-child-of-the-Player-node.jpg)
![Move the sprite image to the center of the axis](https://www.goodpassive.com/wp-content/uploads/2022/06/Move-the-sprite-image-to-the-center-of-the-axis.jpg)
![Set the transform position to 0 for x and y in the Inspector](https://www.goodpassive.com/wp-content/uploads/2022/06/Set-the-transform-position-to-0-for-x-and-y-in-the-Inspector.jpg)
![Save the scene with the name Player](https://www.goodpassive.com/wp-content/uploads/2022/06/Save-the-scene-with-the-name-Player.jpg)
![Rename PlayerIdle to Sprite](https://www.goodpassive.com/wp-content/uploads/2022/06/Rename-PlayerIdle-to-Sprite.jpg)
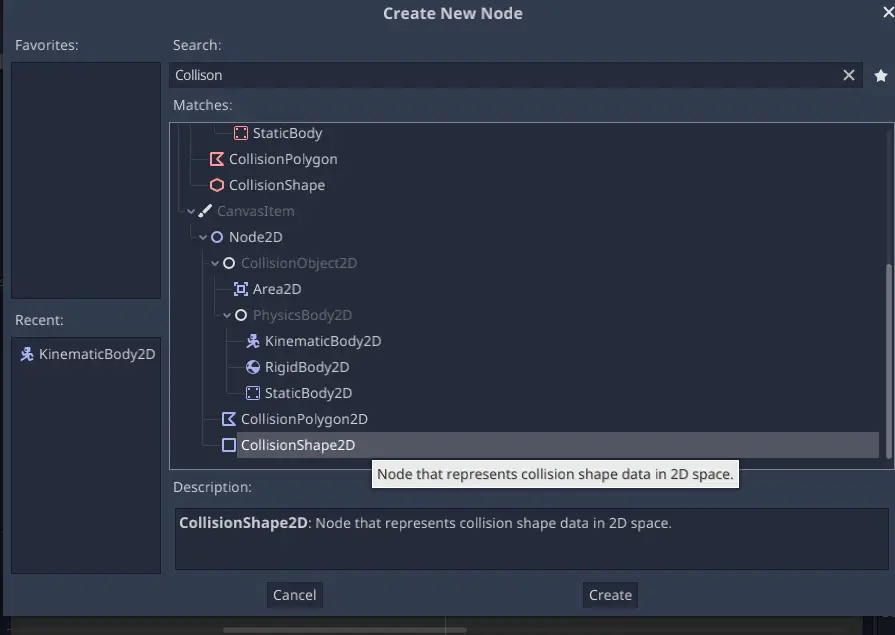
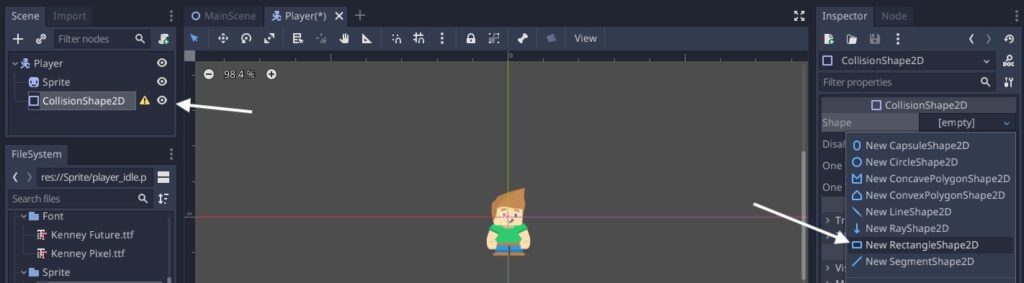
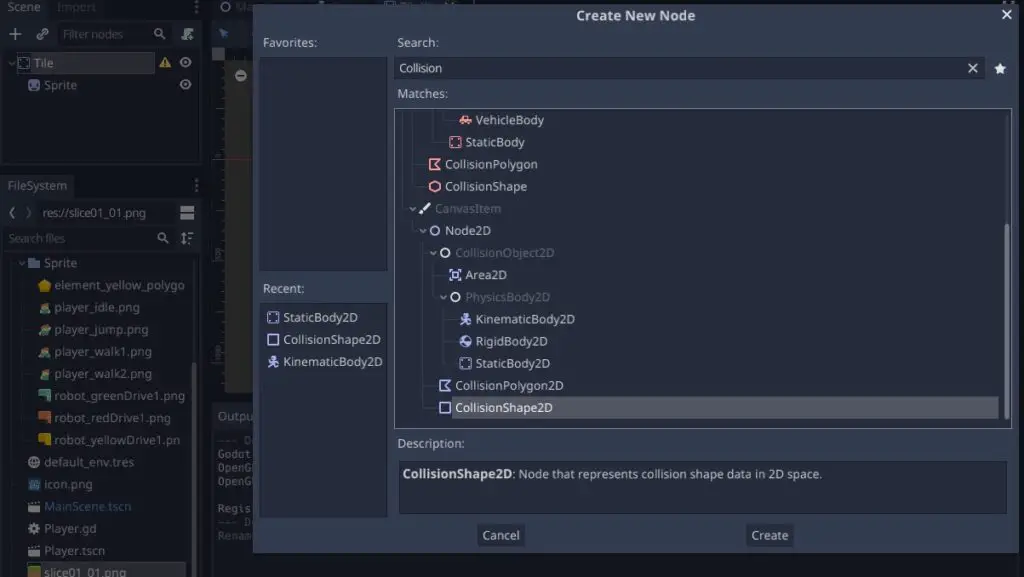
Next, we need to fix the collide node error message. Right now it does not know how it can collide with other objects without a shape.
![Collide node warning error to fix](https://www.goodpassive.com/wp-content/uploads/2022/06/Collide-node-warning-error-to-fix.jpg)
![Add a child node with right click or commanda](https://www.goodpassive.com/wp-content/uploads/2022/06/Add-a-child-node-with-right-click-or-commanda.jpg)
![Search and create a CollisionShape2D node](https://www.goodpassive.com/wp-content/uploads/2022/06/Search-and-create-a-CollisionShape2D-node.jpg)
![With the CollisionShape2D selected go to Shape in Inspector and select NewRectangleShape2D](https://www.goodpassive.com/wp-content/uploads/2022/06/With-the-CollisionShape2D-selected-go-to-Shape-in-Inspector-and-select-NewRectangleShape2D-1024x283.jpg)
![Collider square area is too small for the sprite](https://www.goodpassive.com/wp-content/uploads/2022/06/Collider-square-area-is-too-small-for-the-sprite.jpg)
![Adjusted collision area for the sprite](https://www.goodpassive.com/wp-content/uploads/2022/06/Adjusted-collision-area-for-the-sprite.jpg)
![Put the Player into the main scene with click and drag](https://www.goodpassive.com/wp-content/uploads/2022/06/Put-the-Player-into-the-main-scene-with-click-and-drag.jpg)
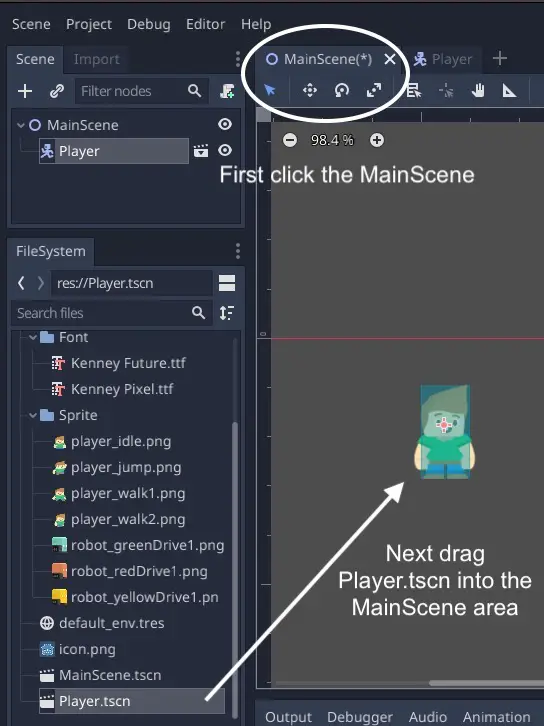
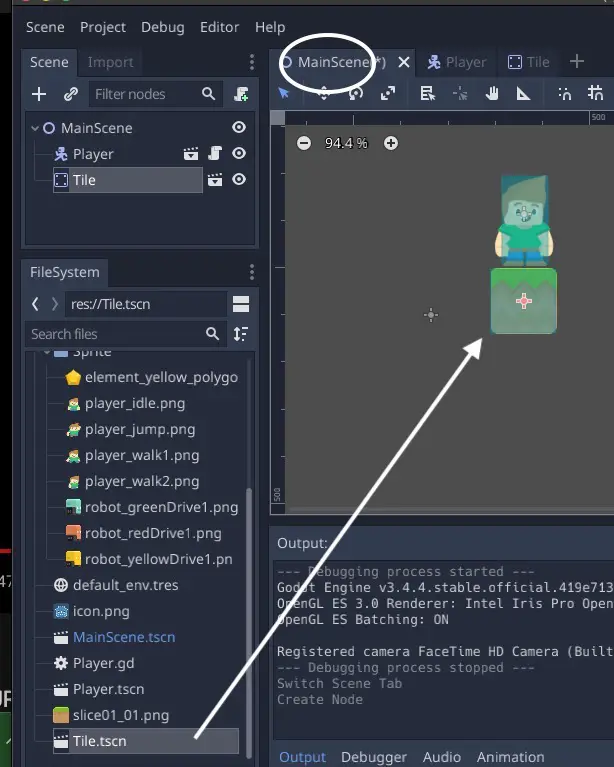
A Player node that is an instance of the Main Scene appears.
![Player node instance](https://www.goodpassive.com/wp-content/uploads/2022/06/Player-node-instance.jpg)
Any changes made on the Player scene will also update on the Player node in the Main Scene
![Zoom out and postion the sprite anywhere in the blue rectangle](https://www.goodpassive.com/wp-content/uploads/2022/06/Zoom-out-and-postion-the-sprite-anywhere-in-the-blue-rectangle.jpg)
![Click Play and sprite will appear](https://www.goodpassive.com/wp-content/uploads/2022/06/Click-Play-and-sprite-will-appear-1024x633.jpg)
Quit the game with the stop button or close the game window. Congratulations, now you have managed to display a sprite on our Godot game.
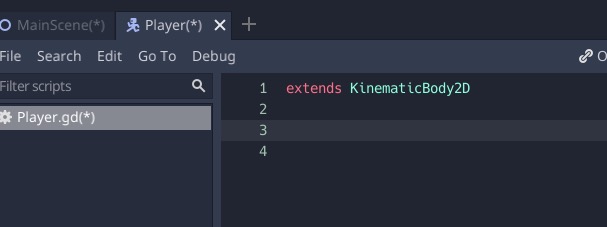
Next, we will begin to control the movements of our sprite with scripting.
![Project Project Settings](https://www.goodpassive.com/wp-content/uploads/2022/06/Project-Project-Settings.jpg)
![INput Map for project settings](https://www.goodpassive.com/wp-content/uploads/2022/06/INput-Map-for-project-settings.jpg)
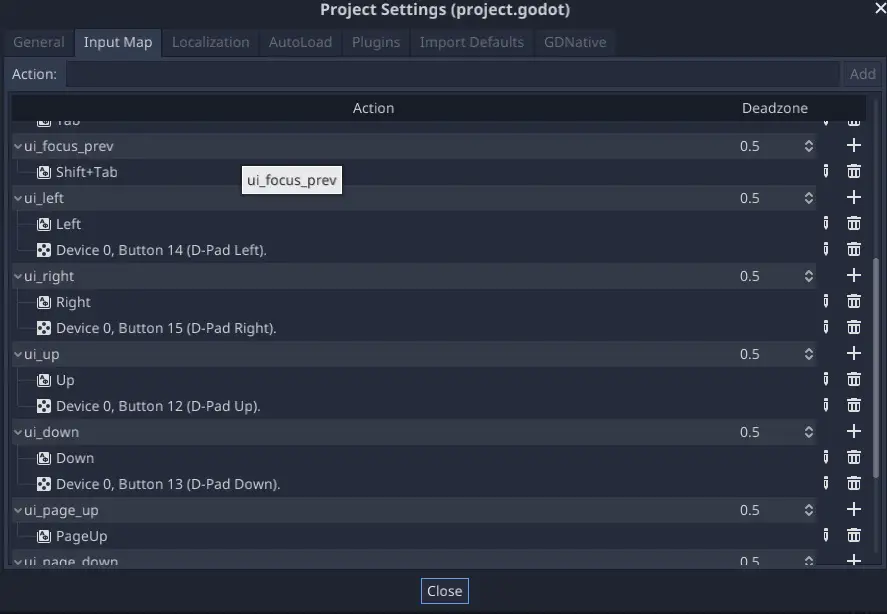
We are interested in 3 inputs: left, right, and jump. Let’s create a new one by typing in the Action box and clicking Add: move_left
![Add key for an action](https://www.goodpassive.com/wp-content/uploads/2022/06/Add-key-for-an-action.jpg)
![Press left arrow key and click Ok](https://www.goodpassive.com/wp-content/uploads/2022/06/Press-left-arrow-key-and-click-Ok.jpg)
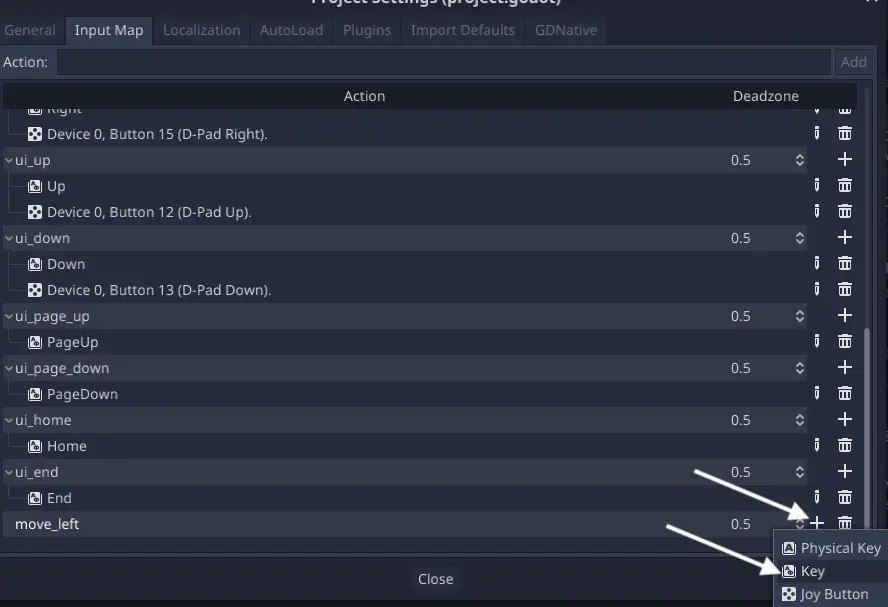
Repeat by creating move_right for the right arrow and jump for the up arrow.
![Create a new script for the Player node](https://www.goodpassive.com/wp-content/uploads/2022/06/Create-a-new-script-for-the-Player-node-1024x517.jpg)
![Click Create to attach node script](https://www.goodpassive.com/wp-content/uploads/2022/06/Click-Create-to-attach-node-script.jpg)
![Player GDScript](https://www.goodpassive.com/wp-content/uploads/2022/06/Player-GDScript.jpg)
Delete everything except the first line so we can use functions the KinematicBody2D such as move, slide, and collide.
![Delete everything except the first extends line](https://www.goodpassive.com/wp-content/uploads/2022/06/Delete-everything-except-the-first-extends-line.jpg)
Next, we create different variable types and assign some values.
![Create GDScript variables for the game](https://www.goodpassive.com/wp-content/uploads/2022/06/Create-GDScript-variables-for-the-game.jpg)
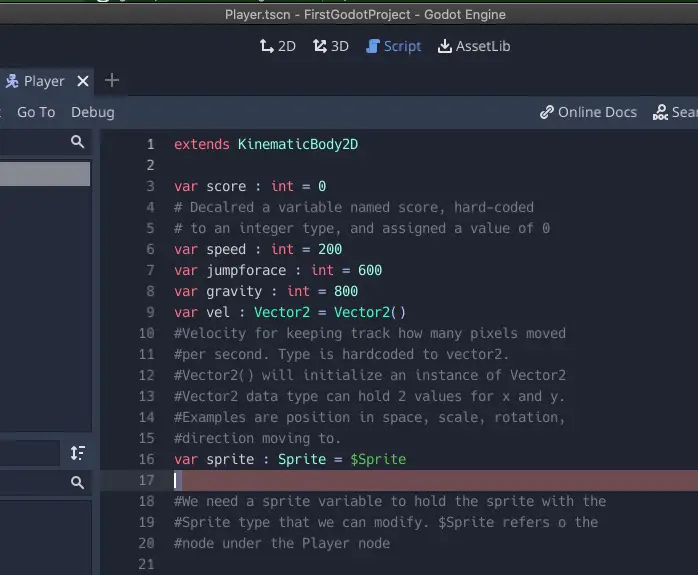
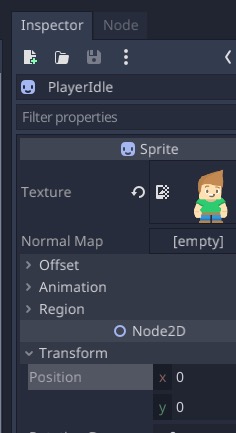
We also create a Sprite date type for our sprite so we can modify values dynamically during the game. For example, we want the sprite to face left when moving left and right when moving right by setting the Flip H (horizontal) value of the Sprite.
![Flip H for the sprite image](https://www.goodpassive.com/wp-content/uploads/2022/06/Flip-H-for-the-sprite-image.jpg)
We get an error below the code screen that prompts us to use another function. Now the error is gone. We get the sprite only after it is initialized or ready with the ‘onready’ command.
![Modify sprite code line](https://www.goodpassive.com/wp-content/uploads/2022/06/Modify-sprite-code-line.jpg)
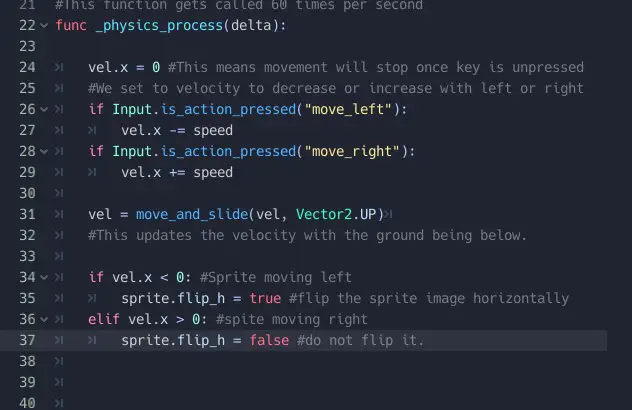
Next, we will make the sprite move by calling the _physics_process built-in function.
Code the basic physics of the sprite, save and run the game.
![Basic physics code for the sprite](https://www.goodpassive.com/wp-content/uploads/2022/06/Basic-physics-code-for-the-sprite.jpg)
![Sprite can now move left and right with the arrow key](https://www.goodpassive.com/wp-content/uploads/2022/06/Sprite-can-now-move-left-and-right-with-the-arrow-key-1024x640.jpg)
Next, we make it face the direction of the movement.
![Flip the image moving in the direction of movement](https://www.goodpassive.com/wp-content/uploads/2022/06/Flip-the-image-moving-in-the-direction-of-movement.jpg)
Save and click play to check.
![Sprite was flipped moving left](https://www.goodpassive.com/wp-content/uploads/2022/06/Sprite-was-flipped-moving-left.jpg)
Next is the application the gravity and the ability to jump.
![Apply gravity and jump physics](https://www.goodpassive.com/wp-content/uploads/2022/06/Apply-gravity-and-jump-physics.jpg)
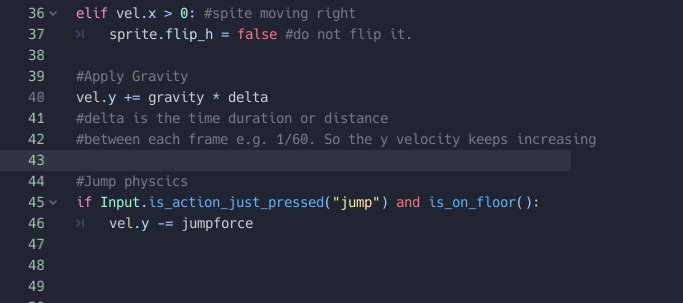
Note: I amended the variable typo from jumpforace to jumpforce.
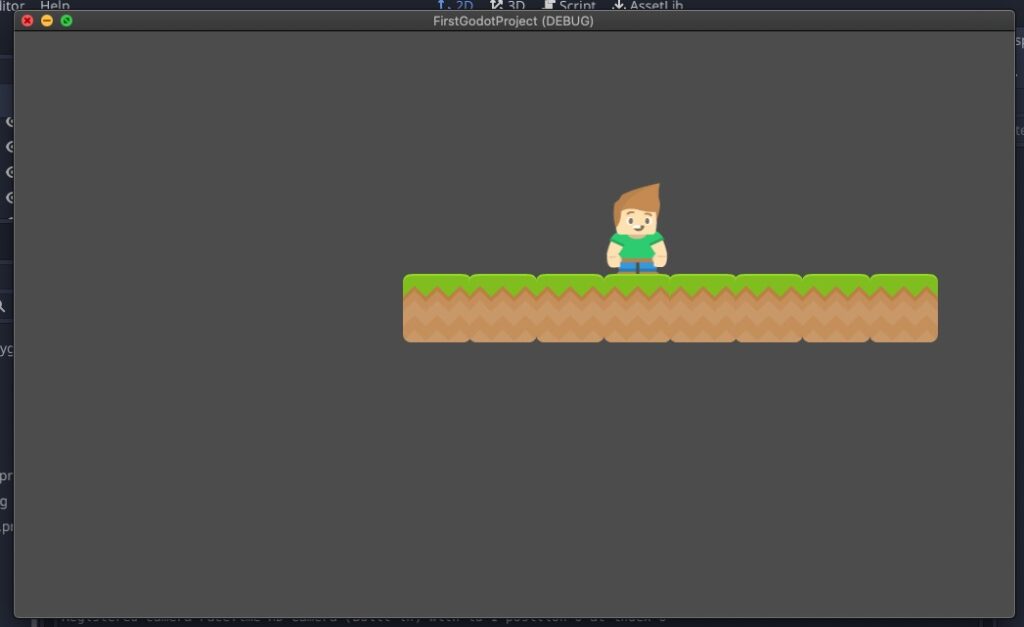
Save and click play. We have not applied a ground for the sprite to stand on, so it will fall right down once the game is started.
![Falling sprite](https://www.goodpassive.com/wp-content/uploads/2022/06/Falling-sprite.jpg)
Next, we will create the tiles for the game.
Create a new scene. Click + Other Node. Select StaticBody2D for creation.
![Create StaticBody2D for our new scene](https://www.goodpassive.com/wp-content/uploads/2022/06/Create-StaticBody2D-for-our-new-scene-1024x615.jpg)
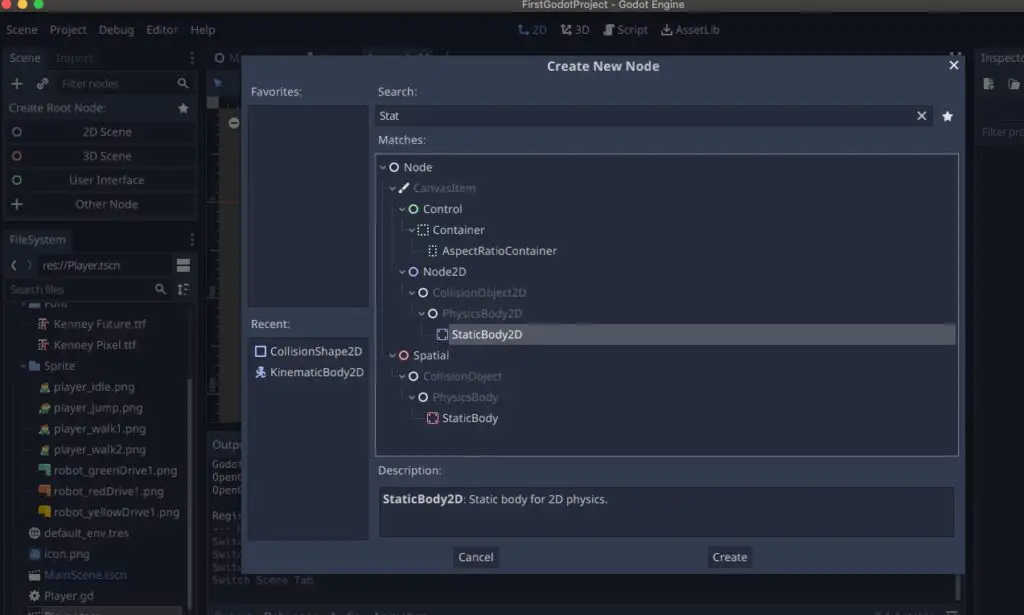
This type of node is static and useful for collision.
![Rename to Tile](https://www.goodpassive.com/wp-content/uploads/2022/06/Rename-to-Tile.jpg)
![Save scene as Tile](https://www.goodpassive.com/wp-content/uploads/2022/06/Save-scene-as-Tile.jpg)
![Drag the tile image into the Tile area and rename it as Sprite on the left](https://www.goodpassive.com/wp-content/uploads/2022/06/Drag-the-tile-image-into-the-Tile-area-and-rename-it-as-Sprite-on-the-left.jpg)
![Add a CollisionShape2D child node](https://www.goodpassive.com/wp-content/uploads/2022/06/Add-a-CollisionShape2D-child-node-1024x577.jpg)
![Set the shape in Inspector for CollisionShape2D to be RectangleShape2D](https://www.goodpassive.com/wp-content/uploads/2022/06/Set-the-shape-in-Inspector-for-CollisionShape2D-to-be-RectangleShape2D-1024x272.jpg)
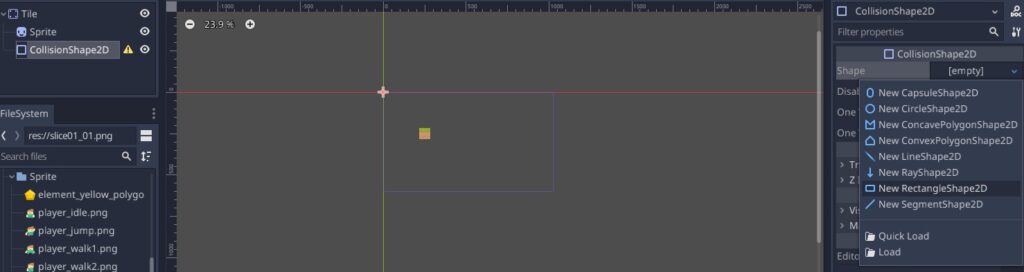
Position both the tile and rectangle collider area to 0 on the x and y-axis with Transform.
![Go to MainScene and click and drag Tile TSCN file onto the MainScene screen area](https://www.goodpassive.com/wp-content/uploads/2022/06/Go-to-MainScene-and-click-and-drag-Tile-TSCN-file-onto-the-MainScene-screen-area.jpg)
Save and click play.
![Sprite now stands on the tile](https://www.goodpassive.com/wp-content/uploads/2022/06/Sprite-now-stands-on-the-tile-1024x627.jpg)
![Sprite can jump as well](https://www.goodpassive.com/wp-content/uploads/2022/06/Sprite-can-jump-as-well.jpg)
Sprite will fall if it moves beyond the tile floor.
Now, we can build a platform by duplicating the tile with Ctrl+d or CMD+d and dragging it out with a mouse click.
![Select the tile or titles and press CMD and D to duplicate and drag it out](https://www.goodpassive.com/wp-content/uploads/2022/06/Select-the-tile-or-titles-and-press-CMD-and-D-to-duplicate-and-drag-it-out-.jpg)
![Use Grid Snap to easily align the tiles straight](https://www.goodpassive.com/wp-content/uploads/2022/06/Use-Grid-Snap-to-easily-align-the-tiles-straight.jpg)
![Tlle platform built with duplication](https://www.goodpassive.com/wp-content/uploads/2022/06/Tlle-platform-built-with-duplication-1024x627.jpg)
![Player can navigate on this simple platform built with Godot](https://www.goodpassive.com/wp-content/uploads/2022/06/Player-can-navigate-on-this-simple-platform-built-with-Godot-1024x631.jpg)
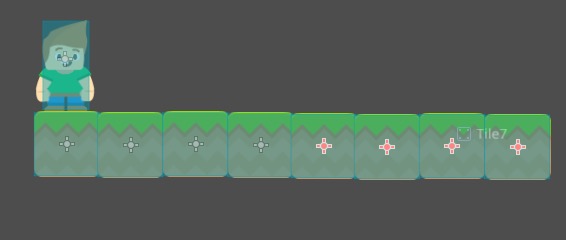
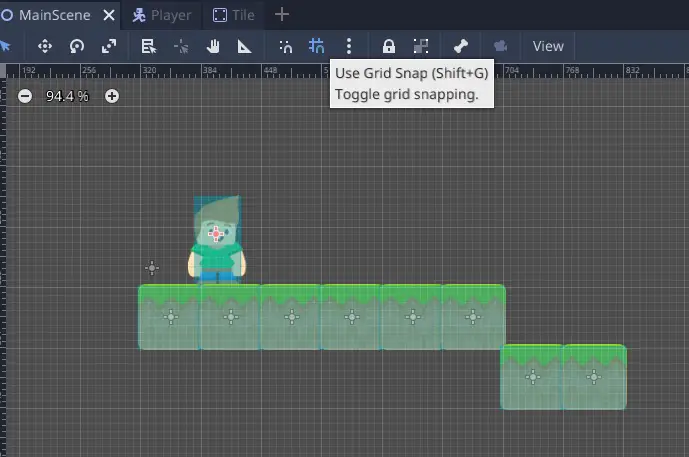
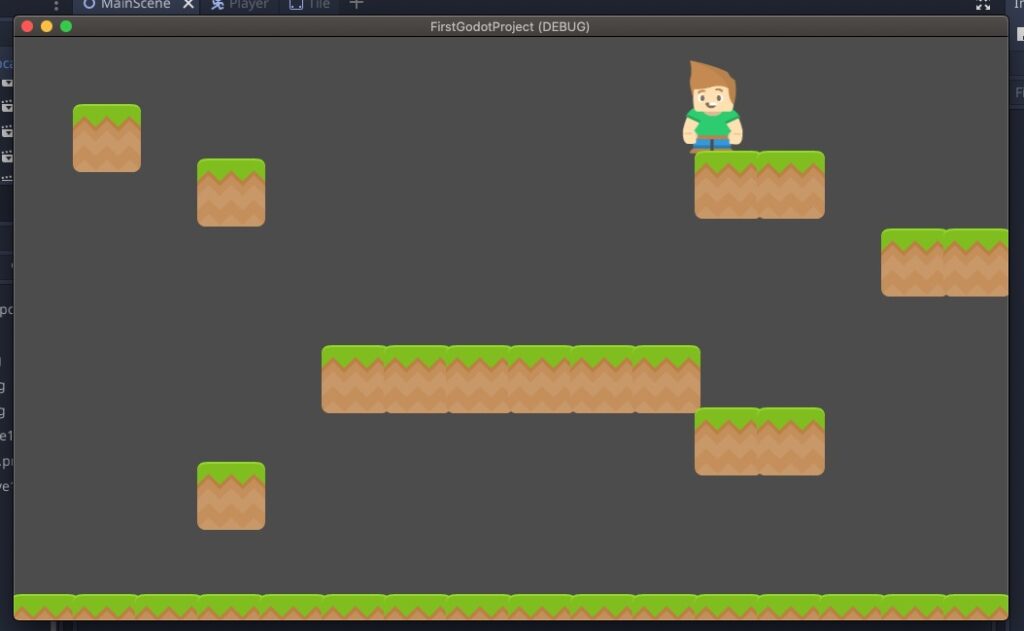
At this point, the player or sprite can move around this little one-scene platform.
What next?
This is far from being a complete game e.g. player can vanish moving beyond the screen, there are no opening welcome screen or ending credits, or lacks any interaction with other objects or nodes. Game development is a long and hard journey, at least for a decent release. And given the extreme high and tough competition out there on various platforms, success is an anomaly.
Conclusion
Godot is a free, lightweight, and stable game engine for creating games. However, building a game will require some learning, and access to support may be important if we get stuck. Another reason I recommend Godot is that they are known for their friendly and nice community.
The hardest part of this tutorial or games development to understand may be the programming physics logic. The version of the Godot used here is v3.4.4 stable. The game engine and all assets used are all released for free use.
One of the problems I realized with learning from free resources maybe they are incomplete on purpose e.g. building a complete game. Rather than learning from one free resource, and then scouting to see if we can find the next level resource, or not. This is not ideal for an arduous project like game development, and definitely without support when we run into problems that will happen.
We can learn from free game development YouTube videos and blogs, however, a more complete and effectively faster learning path is to follow a good and most likely a paid course as well. Our human time and energy are too limited, even free learning resources do not mean it will be worth it.
I believe one of the more complete and comprehensive Godot resources with both the Godot and GDQuest course and community support can be GDQuest’s Learn to Code From Zero With Godot (good for beginners).
Be wholesome.
More Information
What are some Godot or game engine-related posts?